Welcome to Photography!
Hello Mrs. Longs Students,
Unfortunately due to COVID-19 we won't be meeting in the classroom at this time. I am really going to miss seeing your faces over the next few weeks!
That being said- If possible, we can still do some fun photography lessons at home! Join me here, every Monday for a new Photography Lesson you can work at during the week.
E-mail the photographs you are proud of and I will feature them to this page the following week! :)
[email protected]
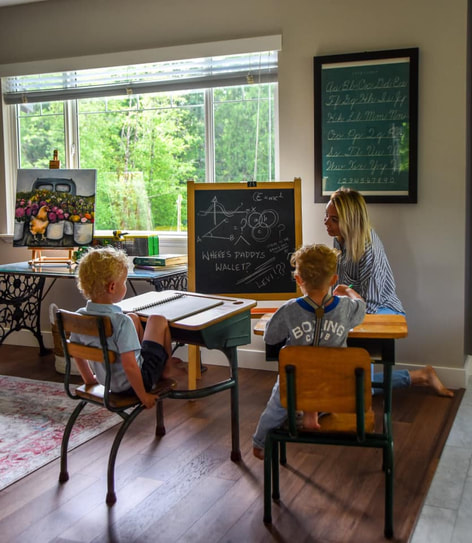
Home project 10 - a day in the life
As the name indicates, for this project you will photograph yourself (with help from a family member or friend.)
This is sometimes called by photographers 'Lifestyle Photography' which means your photos are portraying a 'Slice of Life'. Lifestyle photography tells a story with a single image. Lifestyle Photography is a mix of authentic and staged interactions.
Here are some ideas of possible things you can photograph during your day in the life shoot:
This portrait should give your audience a good idea of what a 'day in the life' looks like for you!
Below is examples and also of a 'Day in the Life' of Mrs. Long
This will be our last project for the year. I am so proud of the photos you have been taking. You photography skills improve each lesson and the creativity I've seen is super cool!
Thanks for being such a great class <3
This is sometimes called by photographers 'Lifestyle Photography' which means your photos are portraying a 'Slice of Life'. Lifestyle photography tells a story with a single image. Lifestyle Photography is a mix of authentic and staged interactions.
Here are some ideas of possible things you can photograph during your day in the life shoot:
- Getting ready – combing hair, brushing teeth, etc.
- Hobbies – gardening, reading, play gaming, do puzzles, do pet grooming, cook, dance, sew, BBQ, etc.?
- Get out in the backyard or play fetch with the dog.
- Details shots – make sure to get some close-ups of things that really show what your all about. Hands, clothing, feet, personal items, etc.
- Clothing – Do you have a special article of clothing or jewelry that really identifies you? Photograph it!
This portrait should give your audience a good idea of what a 'day in the life' looks like for you!
Below is examples and also of a 'Day in the Life' of Mrs. Long
This will be our last project for the year. I am so proud of the photos you have been taking. You photography skills improve each lesson and the creativity I've seen is super cool!
Thanks for being such a great class <3
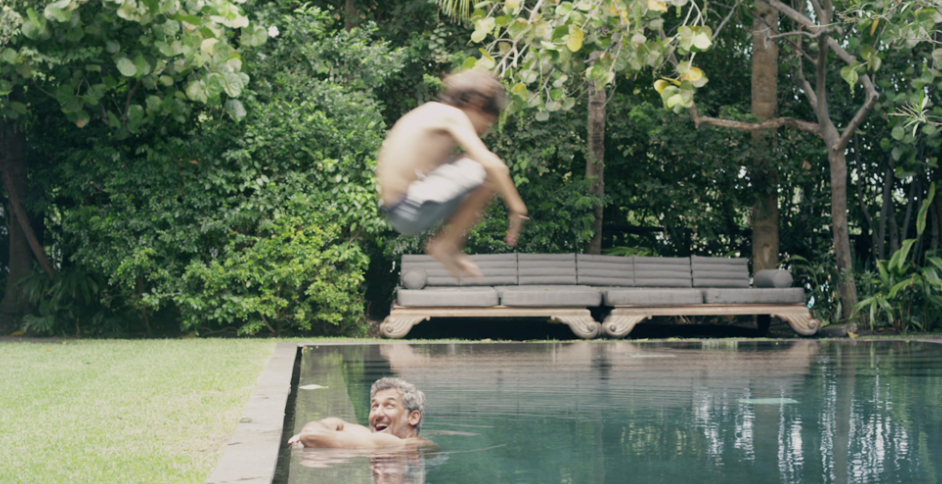
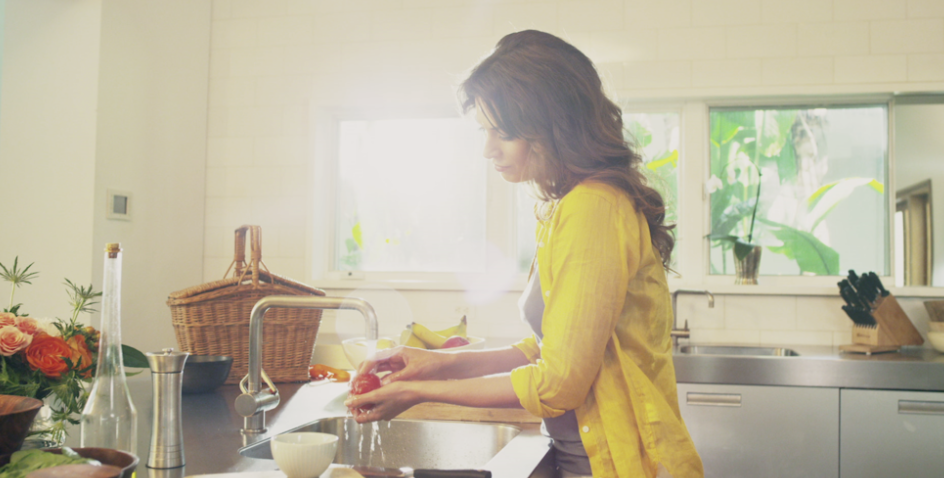
A day in the life - Mrs. Long
More examples below:

Feature Photographers - Pets
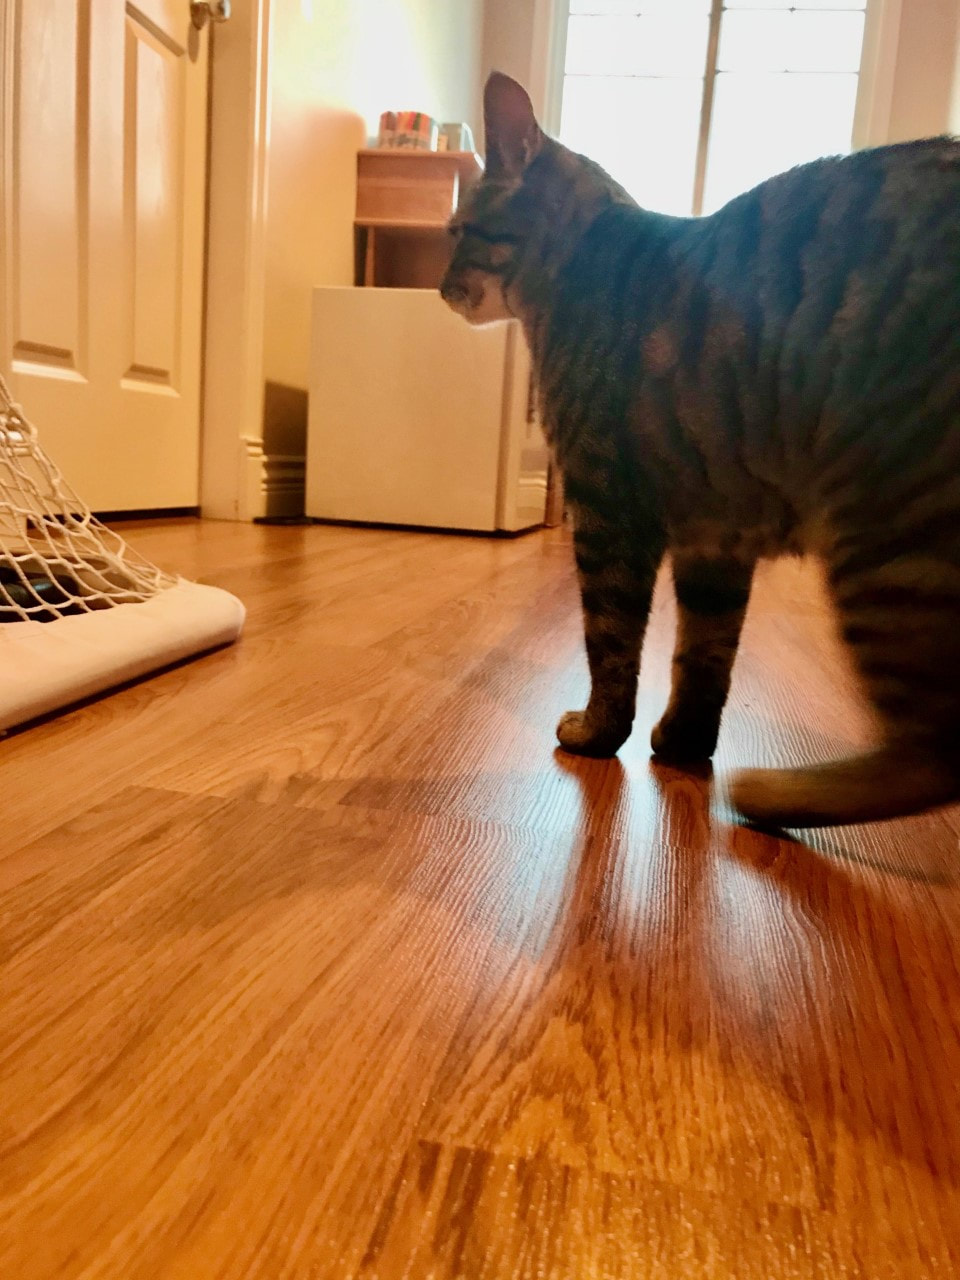
Home Project 9 - Pet Photography
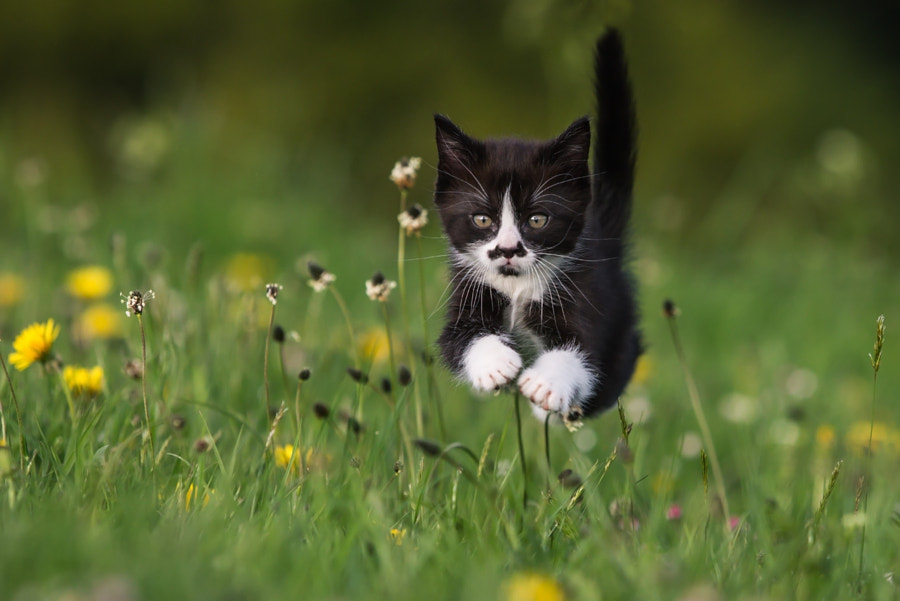
For these last few weeks of June I thought we'd keep the Photography assignments light and fun! For this week we will dive into Pet Photography.
Before you start photographing your pet, ask yourself 'What sets my pet apart from other animals? What type of personality does it has?'
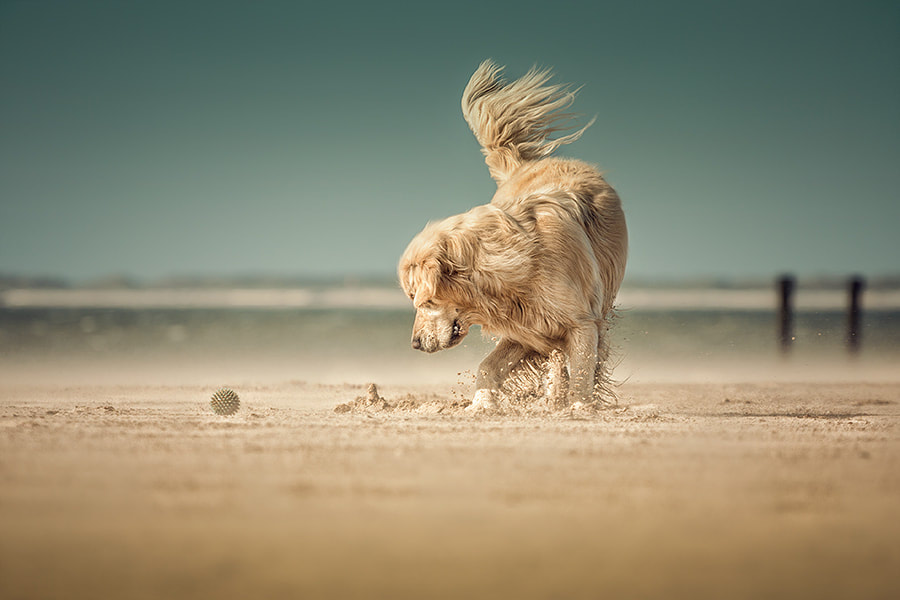
For example, if everyone knows your pet as a sleep, lazy little thing than set up your photo shoot around it's bed or where it goes to lie in the sun. Alternatively if your pet is hyperactive and always on the move - it might be better to do your shoot where they are racing around, jumping for balls or playing with other animals.
Tips for Pet Photography:
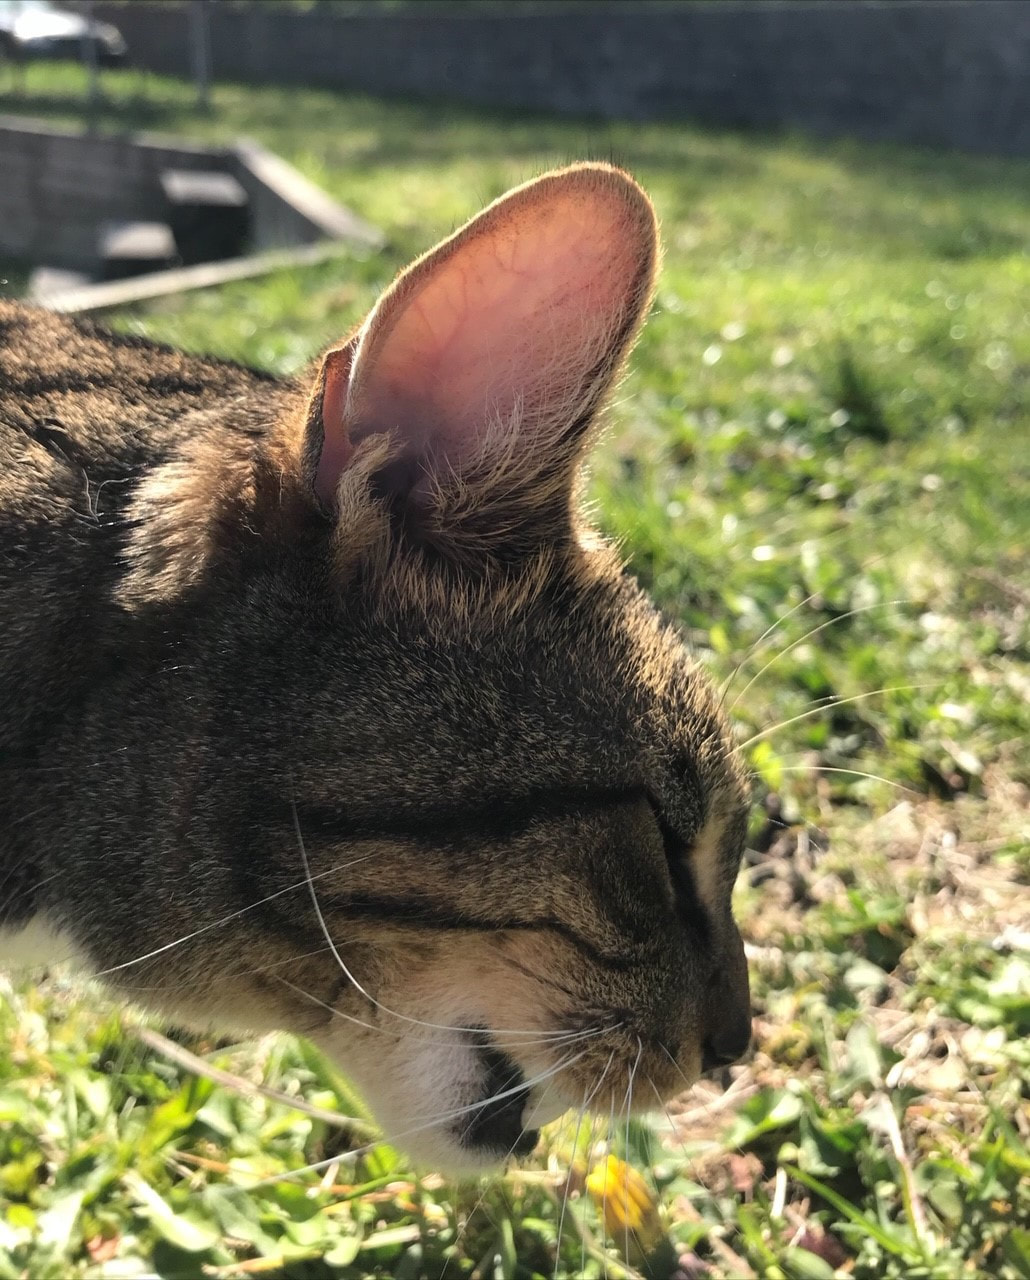
Think about Context - Choose a place where your pet will be comfortable and at ease. Consider the background of your shots. You don't want your backgrounds to be distracting from your photo. Sometimes the best locations are the plainest ones - a large patch of green grass, a well lit room with white walls or a plain carpet etc.
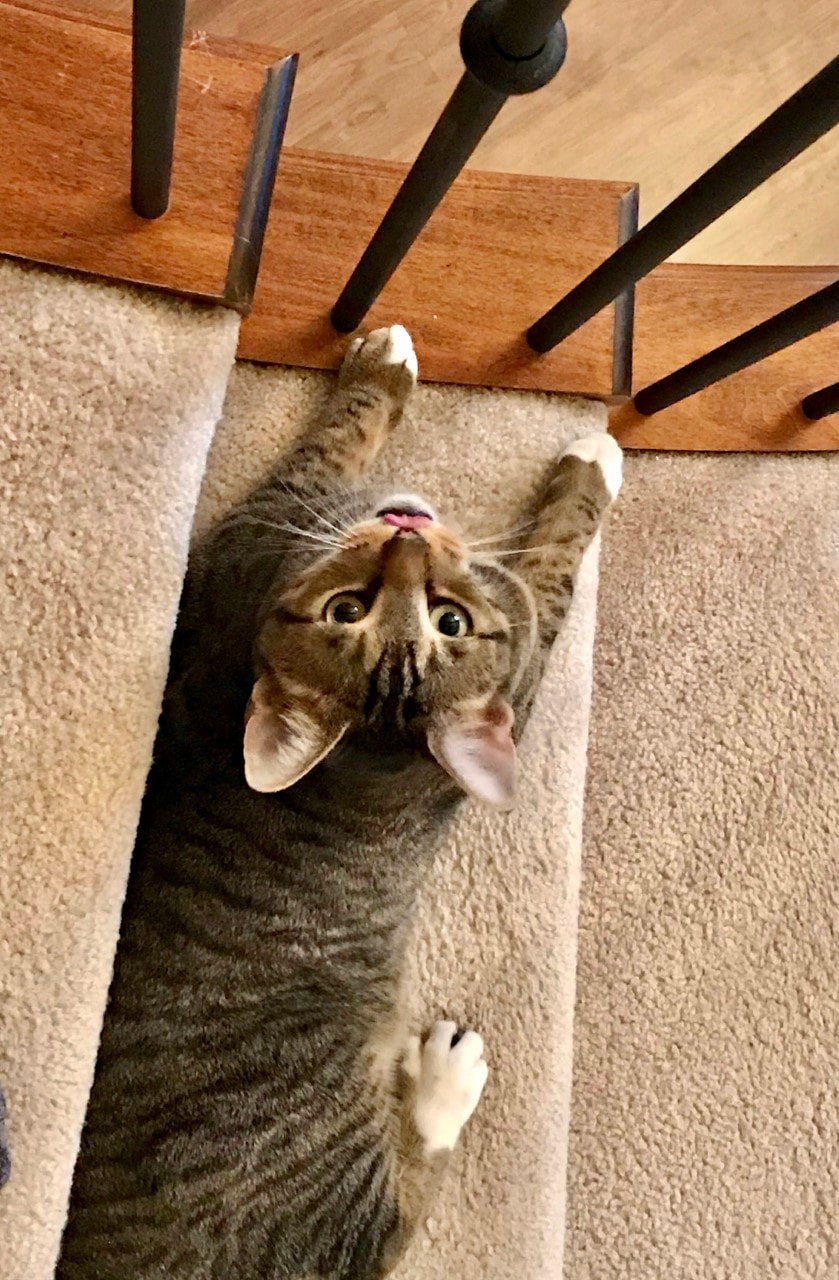
Get in Close- It's worth making the effort as the detail that can be gained and the personality can be captured up close. Get down on your pets level where you can look upon them eye to eye. Getting down on your pets level means you enter their world and get a glimpse of what life looks like from their angle.
Lighting- Natural light is the best option using an I-pad. Don't use the flash and take your photos either outside or close to a window.
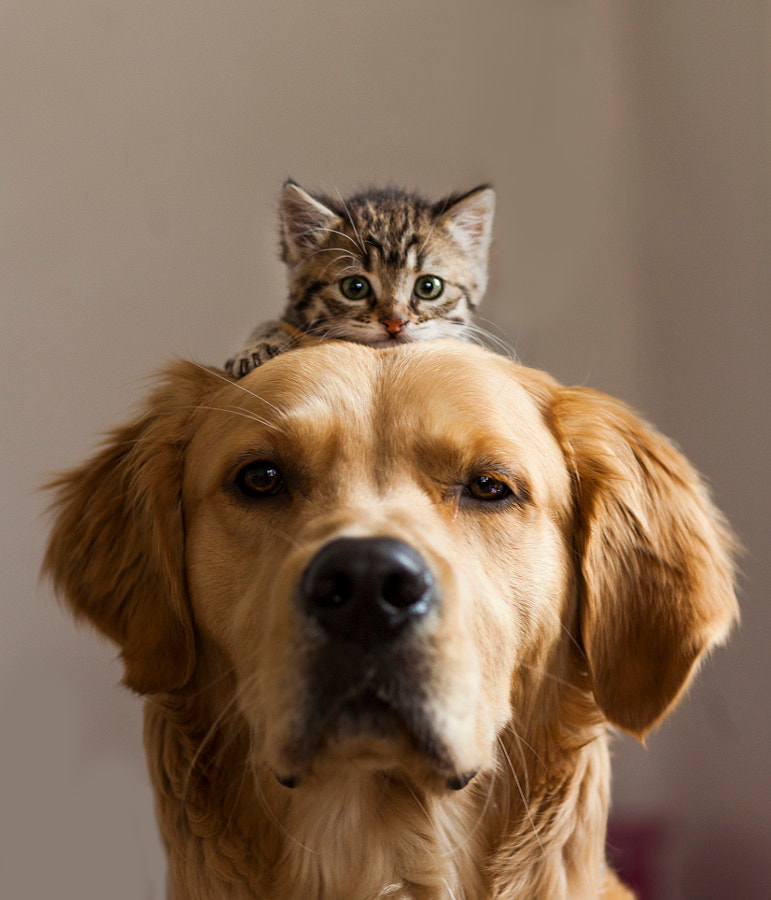
Include People- Shots with the other or other family members interacting with your pet can make the images special for years to come.
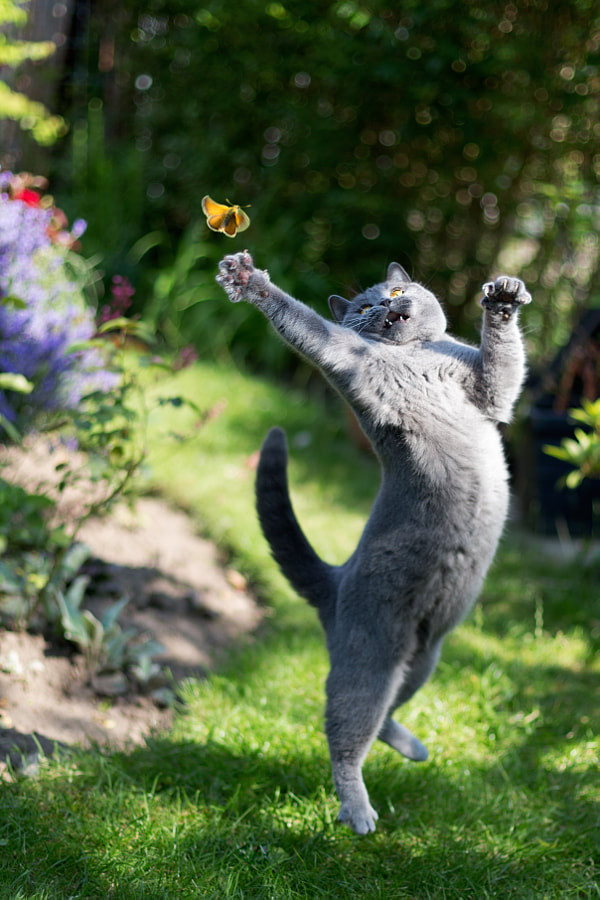
Be Playful- Pets can be playful little critters and rather than attempting to contain this to get them posed for a shot, its often effective to go with their playfulness and make it a central feature of your image.
Below are some examples of Pet Photography. I can't wait to see all the Pets you have to share! Post your best photo by next Friday for your Pet to be featured on the site.
Before you start photographing your pet, ask yourself 'What sets my pet apart from other animals? What type of personality does it has?'
For example, if everyone knows your pet as a sleep, lazy little thing than set up your photo shoot around it's bed or where it goes to lie in the sun. Alternatively if your pet is hyperactive and always on the move - it might be better to do your shoot where they are racing around, jumping for balls or playing with other animals.
Tips for Pet Photography:
Think about Context - Choose a place where your pet will be comfortable and at ease. Consider the background of your shots. You don't want your backgrounds to be distracting from your photo. Sometimes the best locations are the plainest ones - a large patch of green grass, a well lit room with white walls or a plain carpet etc.
Get in Close- It's worth making the effort as the detail that can be gained and the personality can be captured up close. Get down on your pets level where you can look upon them eye to eye. Getting down on your pets level means you enter their world and get a glimpse of what life looks like from their angle.
Lighting- Natural light is the best option using an I-pad. Don't use the flash and take your photos either outside or close to a window.
Include People- Shots with the other or other family members interacting with your pet can make the images special for years to come.
Be Playful- Pets can be playful little critters and rather than attempting to contain this to get them posed for a shot, its often effective to go with their playfulness and make it a central feature of your image.
Below are some examples of Pet Photography. I can't wait to see all the Pets you have to share! Post your best photo by next Friday for your Pet to be featured on the site.
Feature Photographers - Photo of Choice
Your choice / photo scavenger hunt
I am so proud of all my photography students. The photos you've been sending have been full of creativity and inspiration. I just love seeing them. This week I what you to send me any photo that you are PROUD of! Its YOUR CHOICE!
Use the skills you've learned and show me what you got!
"Photography takes an instant out of time, alternating life by holding it still." -Dorothea Lange
The Photography Scavenger hunt is meant only for ideas but feel free to complete it if you would like.
Looking forward to seeing your photos :)
Use the skills you've learned and show me what you got!
"Photography takes an instant out of time, alternating life by holding it still." -Dorothea Lange
The Photography Scavenger hunt is meant only for ideas but feel free to complete it if you would like.
Looking forward to seeing your photos :)

featured photographers - Respect
Home Project 8 - Respect Poster
What is Respect?
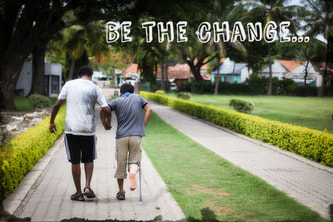
Your Assignment: Take an inspirational photograph that expresses a positive message of respect for others. You can use the Photo Editor to add text to you image.
Here's some text or quotes you can use for inspiration:
Below are some examples. I can't wait to see what you come up with!
- Valuing each others point of view.
- Accepting people as they are.
- Being polite and kind always.
- Not 'dissing' people because they are different from you.
- Not gossiping about people or spreading lies.
- Standing up for and helping others who are not being treated kindly.
Your Assignment: Take an inspirational photograph that expresses a positive message of respect for others. You can use the Photo Editor to add text to you image.
Here's some text or quotes you can use for inspiration:
- RESPECT
- BE KIND
- BE THE VOICE, NOT THE ECHO
- "Be the change you wish to see in the world." - Gandhi
- "Be the change" - Gandhi
- "Be kind whenever possible. It is always possible." - The Dalai Lama
- "No act of kindness, however small, is ever wasted." - Asesop
Below are some examples. I can't wait to see what you come up with!


Featured Photographers - Like Aaron Siskind
Photography Artist to check out.. Assignment is below.
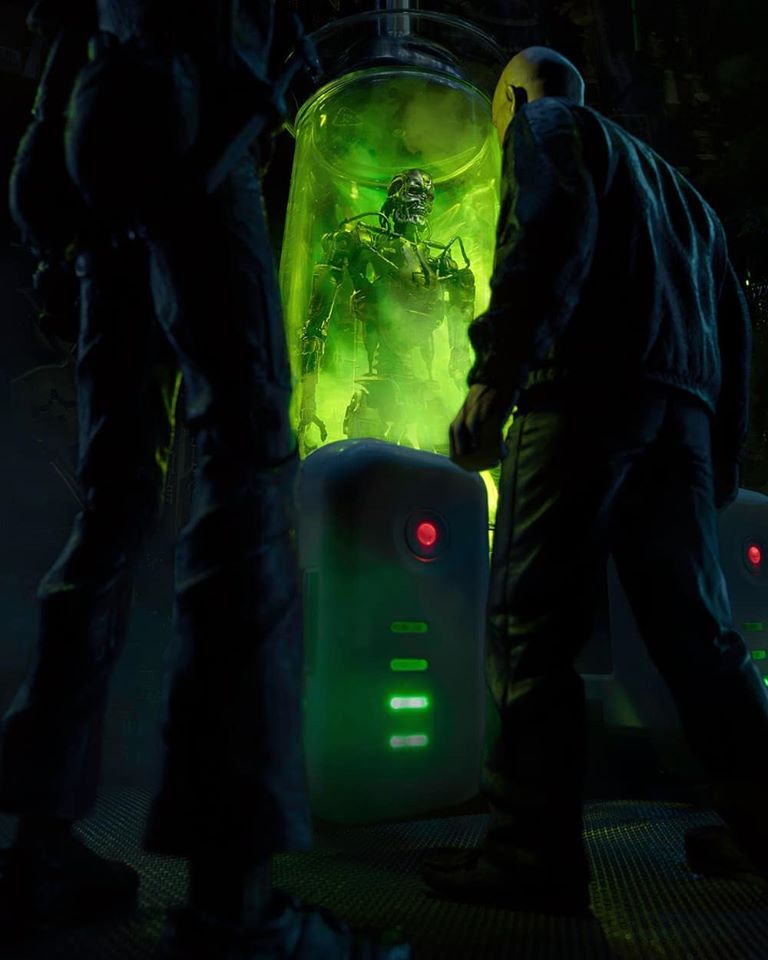
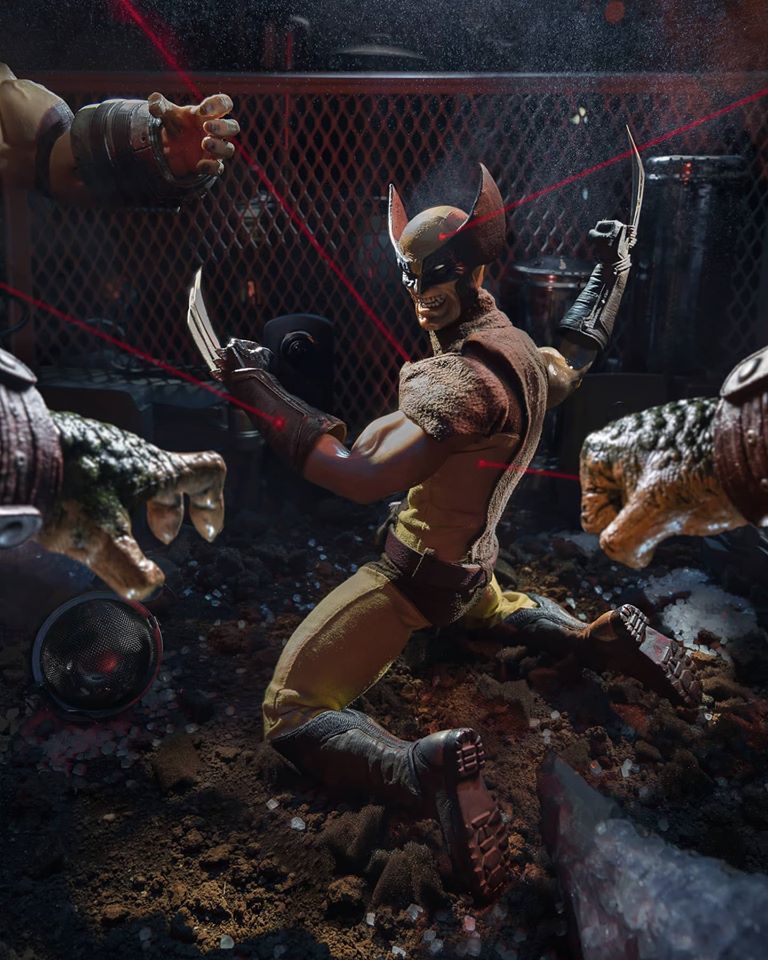
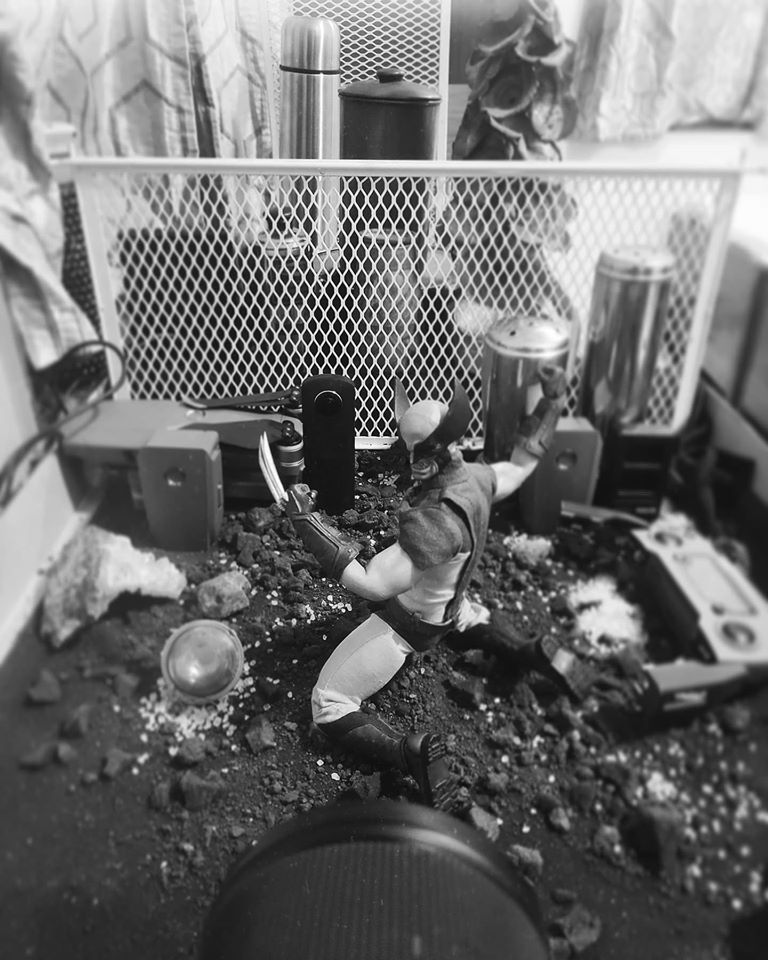
This is Arjun Menon. He is a travel and commercial automotive photographer and the Founder of 'Art Leaves A Mark.' and also a TEDx speaker.
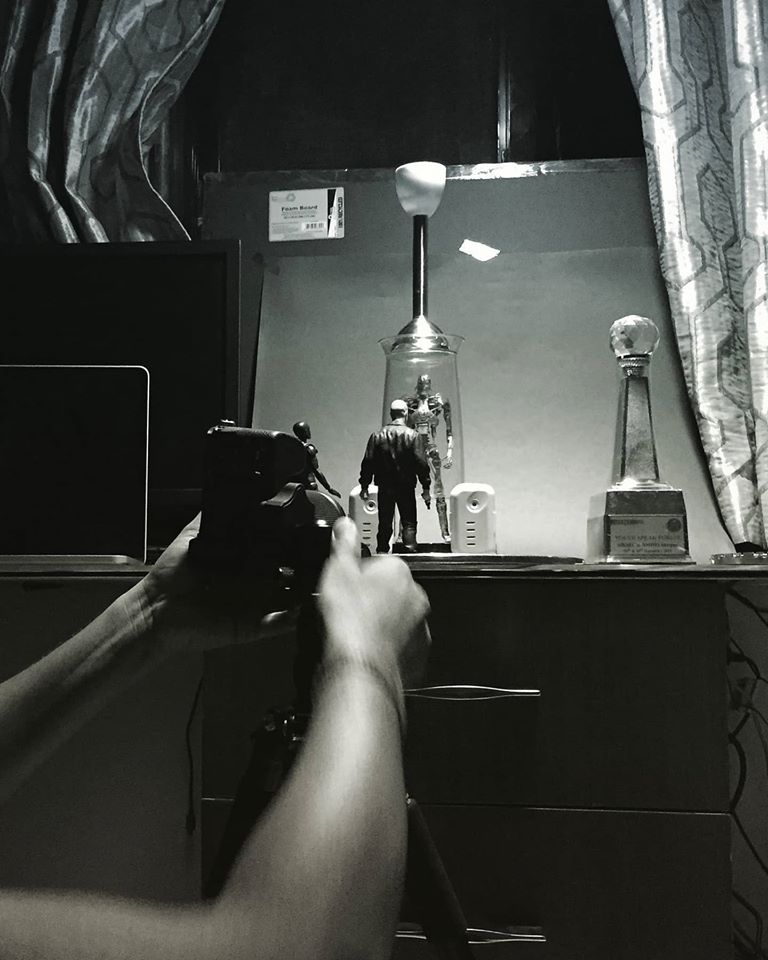
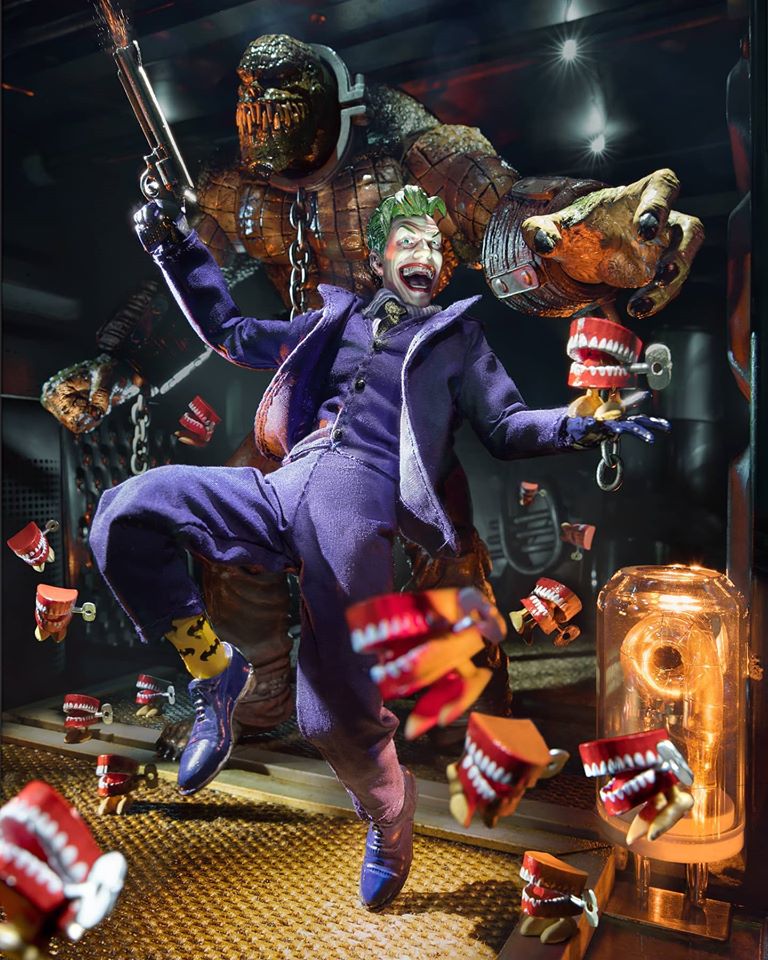
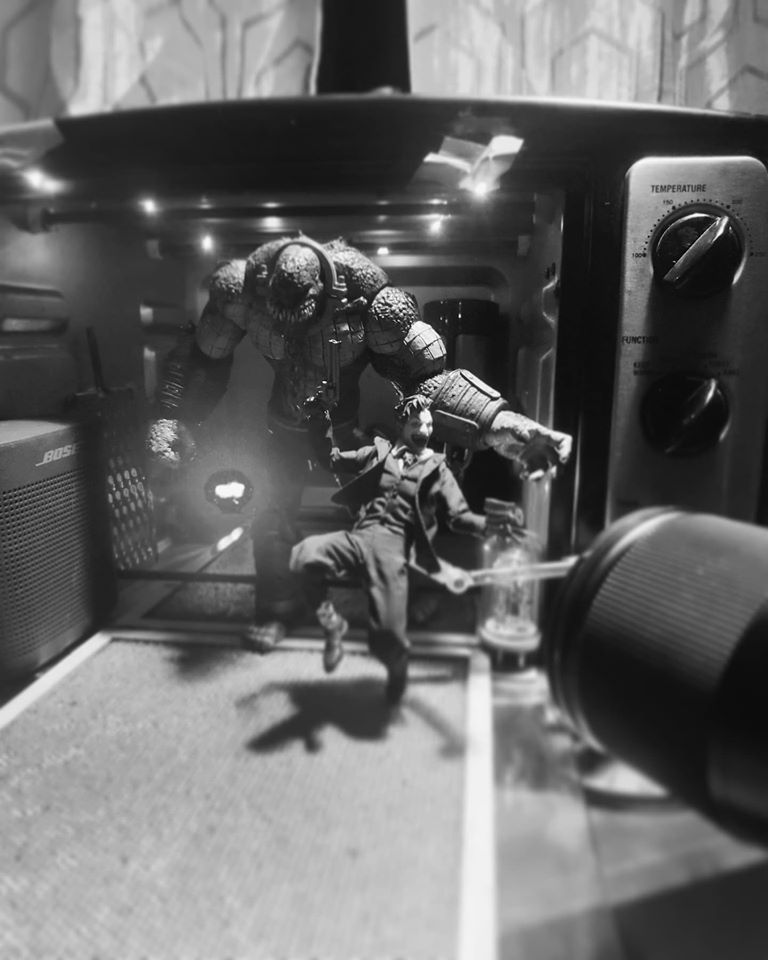
Arjun believes it is important to have a deep interest in Fine Art Photography as it opens your mind to all kinds of possibilities. Even though he was unable to take his travel photos because of Covid-19 and lock downs, he did something really cool! He started taking photos of action figures at his house using household items. Below are examples of his photos and how he took them. Even in challenging times, you can use your creativity to come up with new and exciting works of art!
Hope you enjoy! If you look him up he has some videos on how he created these images and what he used for editing.


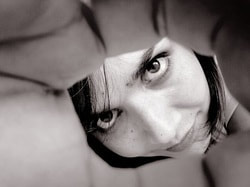
Home project 7 - shoot like aaron siskind
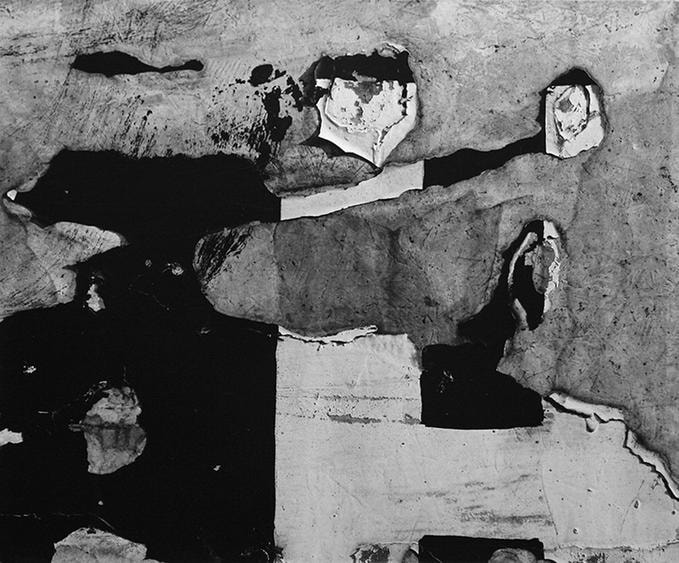
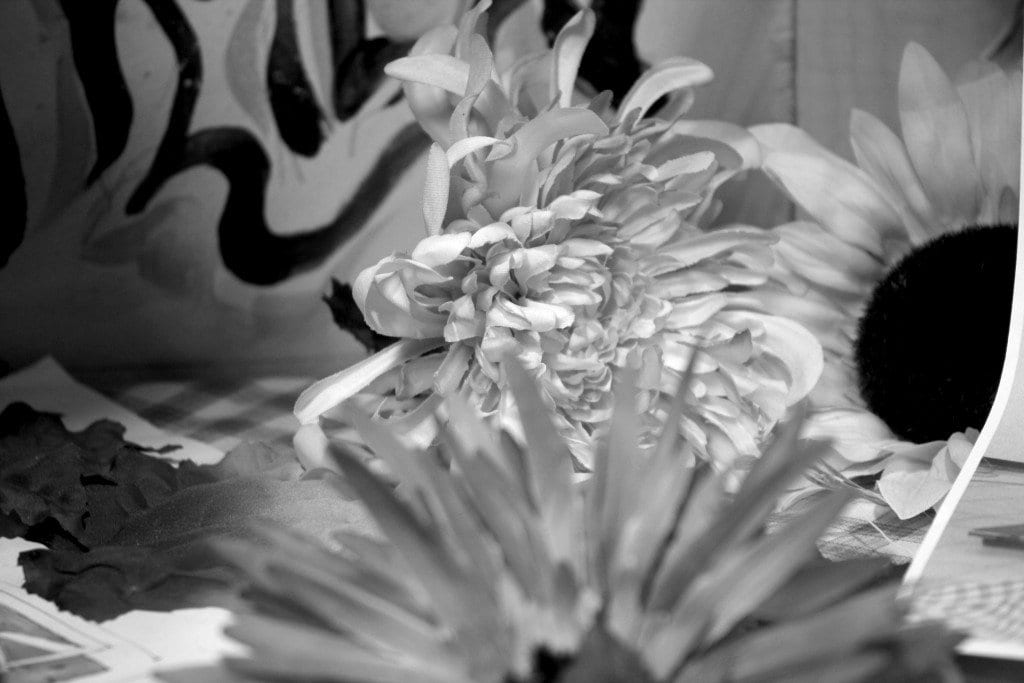
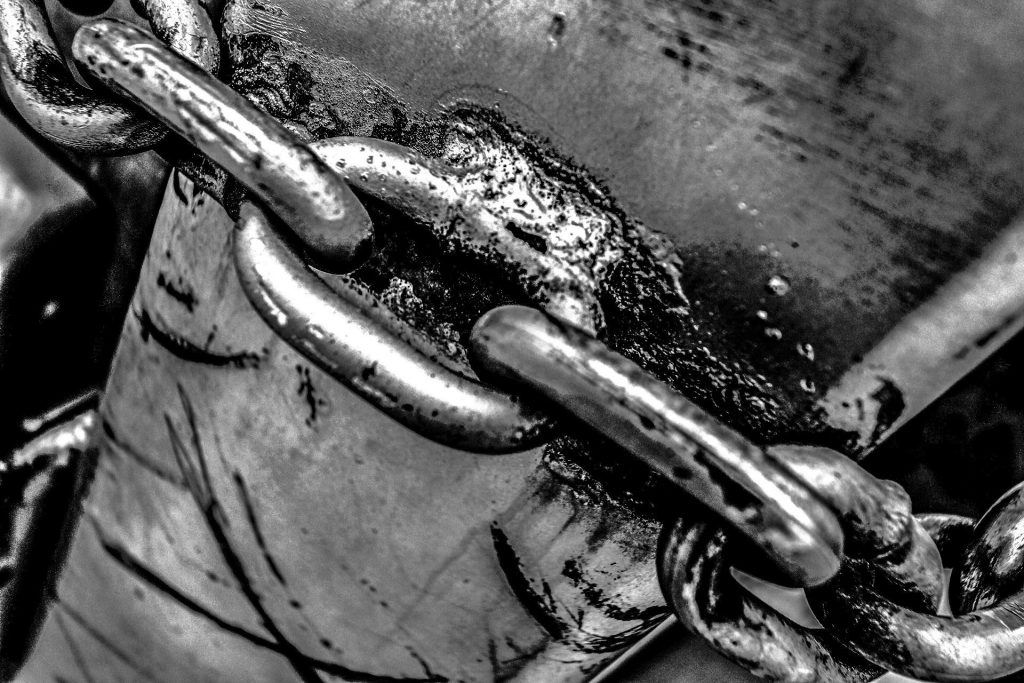
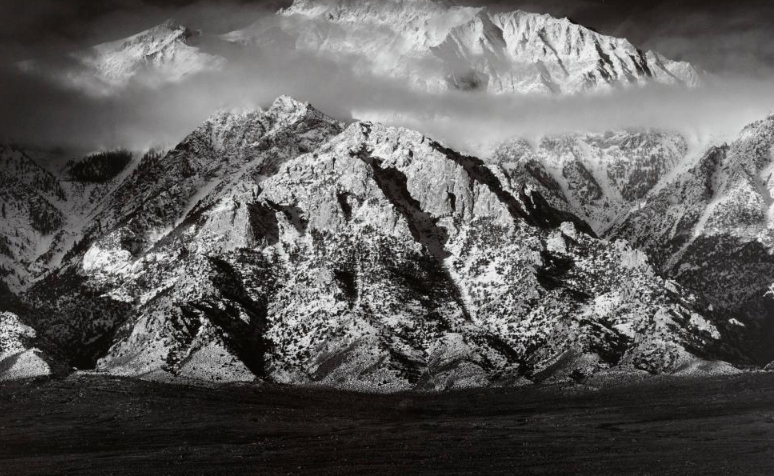
Aaron Siskind was an American photographer who shot abstract black and white images. His work would focus on the details of things and he took his photos close up so you couldn't tell the scale of the item or the context. Their ambiguity caused his viewers to wonder what they could be.
You assignment this week is to take some photographs in the Monochrome setting. Below are some examples of his work:
You assignment this week is to take some photographs in the Monochrome setting. Below are some examples of his work:


Featured photographers - trick photography
Home Project 6 - Trick Photography
Trick photography is a great way to dazzle and amaze your friends and family. You can of course use photo-shop to edit and manipulate your images, but you can also set them up to be tricky in the first place.
Here are some ways you can create trick photography:
1. Perspective
Perspective is the distance between the camera and the items. You can distort this to make trick photographs. Make an object seem unusually huge by placing it closer to the camera. It will appear huge compared to the other items in the environment.
2. Angles
Tilting the camera can trick your audience. Imagine that you have your subject lay down on the ground sideways and pretend to climb the side of the wall...if you turn the photo after you have shot the picture, it appears that your subject is scaling the wall. What else can you do?
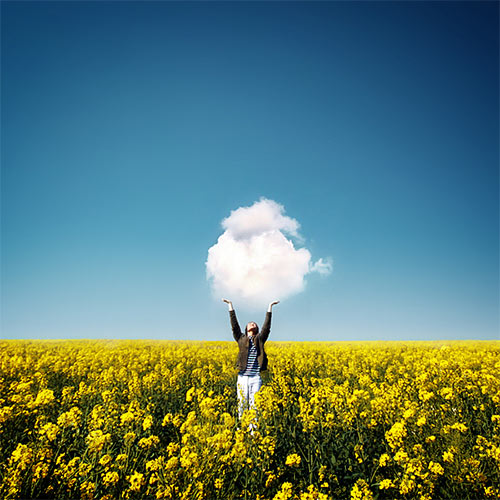
3. Forced Perspective
Forced perspective is a photography technique that uses optical illusion to make an object look further away, closer up, larger, or smaller than it actually is. This is the same technique that is used in films to make small models of objects look like the real thing.
Search "forced perspective photography examples" on Google images to see what we are talking about. One object will appear closer/bigger than another, making it seem unusual.

|
|
|
|
Below is a video so you can get a visual of how to take this types of photos: You will need someone to help you take your photo!
Can't wait to see what you come up with this week! Send me a photo of your favorite shot. I LOVE seeing your photography!
Can't wait to see what you come up with this week! Send me a photo of your favorite shot. I LOVE seeing your photography!
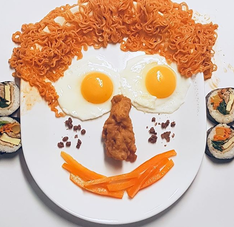
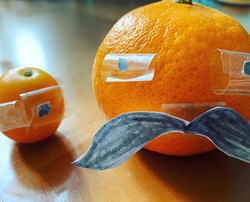
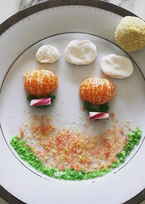
Featured Photographers - Food Art
How creative our these photos! I'm impressed :) Check out the last two: One is Mr. Kujawa's and one is Mr. Heins, can you guess who is who?
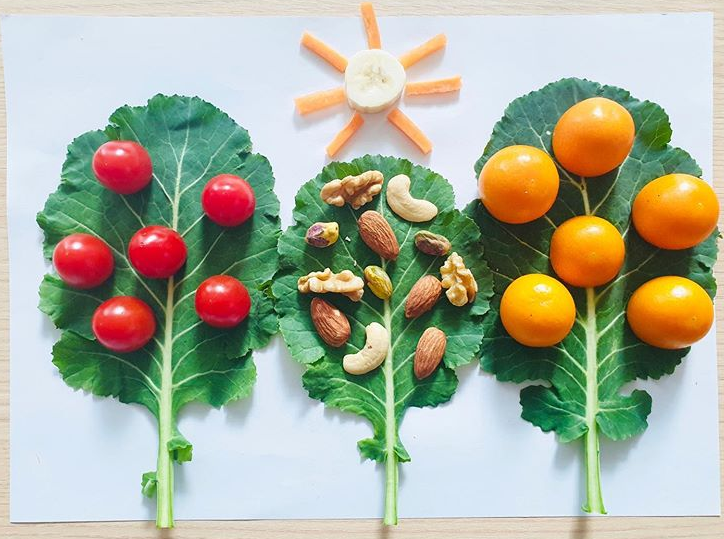
Home Project 5 - Food Art
Businesses like restaurants, food trucks, bakeries and grocery stores thrive on the strength of their food photography. This week we are going to have some FUN with that and be a bit silly! Check out these example below:
|

|

|
There are a few important factors you need to think of when creating your Food Art:
Below is a PowerPoint with some more ideas and helpful tips for this project.
I'm stoked to see what you come up with!
- Arrangement: Are you going to create a design? Create a scene? Brainstorm what you need and how you will place it.
- Lighting: How can you use light to bring out your food's good side. In class we talked about natural light (taking a photo close to a window can be flattering or outside.)
- Choose the right surface: Classic white give vibrant pop! You could use a plate or a piece of paper beneath.
- Focus: Make sure you click the area of your i-pad you'd like it to focus on.
Below is a PowerPoint with some more ideas and helpful tips for this project.
I'm stoked to see what you come up with!
Featured Photographers -Quarinthings
This was not an easy photography assignment to do! I was so inspired by how AWESOME of a job you all did, I decided to do my own take on 'Quarinthings' - check out the last photos to see :)
Home Project 4: Virtual Learning portraits. 'Quarinthings'
| photography_lesson.pptx |
DIRECTIONS FOR THE PROJECT:
- Collect at least 15 items that have been most important to you during quarantine.
- Find a spot in your home that will work well for your 'photo-shoot'. You will probably want to choose the largest floor space in your home. (You can use a blanket or sheet to lay down to make the photo more interesting if the floor seems "boring".)
- Ask someone to help you decide how you will take the final photo. (I would suggest laying down on the floor and asking your helper to make sure they can see you and all your stuff in the photo.
- Now you are ready to set all of your items out on the floor to create an interesting composition. Remember to leave space for yourself haha.
- Take your photo, edit if you'd like and submit it to Schoology.
IDEAS FOR ITEMS:
Can't wait to see what you come up with :)
- games
- snacks
- markers/ highlighters
- running shoes
- labtop
- watercolors
- sketchbook
Can't wait to see what you come up with :)
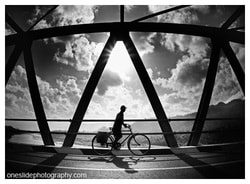
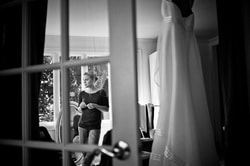
Framing - Featured Photographers
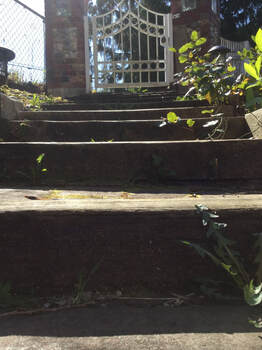
HOME PROJECT 3: Framing
Framing refers to encompassing or surrounding your subject with other elements, that help to focus you attention on the subject. Framing brings more depth to the picture and a better focus on what the main subject is.
There are several ways you can frame your subject:
There are several ways you can frame your subject:
You can frame your subject completely with your subject surrounded on all sides.
You can frame your subject from behind, by placing your subject in front of whatever element is framing it.
|

You can frame your subject from in front, by placing your subject behind the elements that will frame it.
You can frame your subject using man made objects/ architectural elements or nature.
|
1.) Take a photograph of a person or object that is framed from behind.
2.) Take a photograph of a person or object that is framed from in front.
3.) Take a photograph of a person or object that is framed and shows an interesting point of view.
E-mail your favorite photo with framing and I will feature it on the website next week!
2.) Take a photograph of a person or object that is framed from in front.
3.) Take a photograph of a person or object that is framed and shows an interesting point of view.
E-mail your favorite photo with framing and I will feature it on the website next week!
Leading Lines - Featured Photographers
Leading Lines by Logan. Nice shot!
Leading Lines by Aidyn Young. Well done!
Sophia's 'Leading Lines', Beautiful shot!
|
Emily Wades, Leading Lines. Looks good!
Teya's 'Leading Lines'. Nice work!
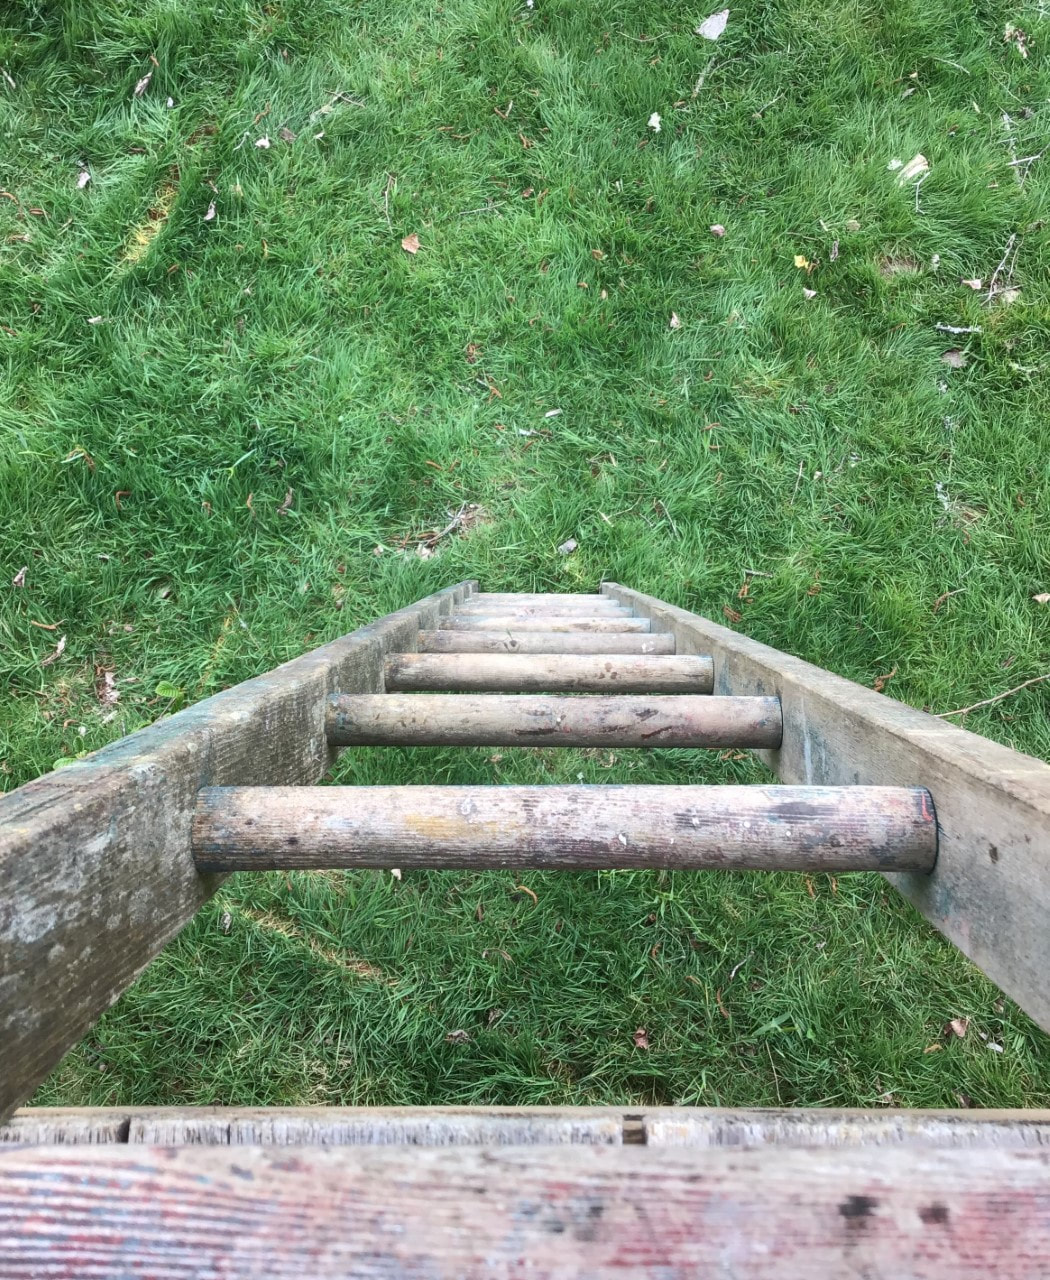
Jack's Leading Lines, looking down a ladder! Very creative.
|
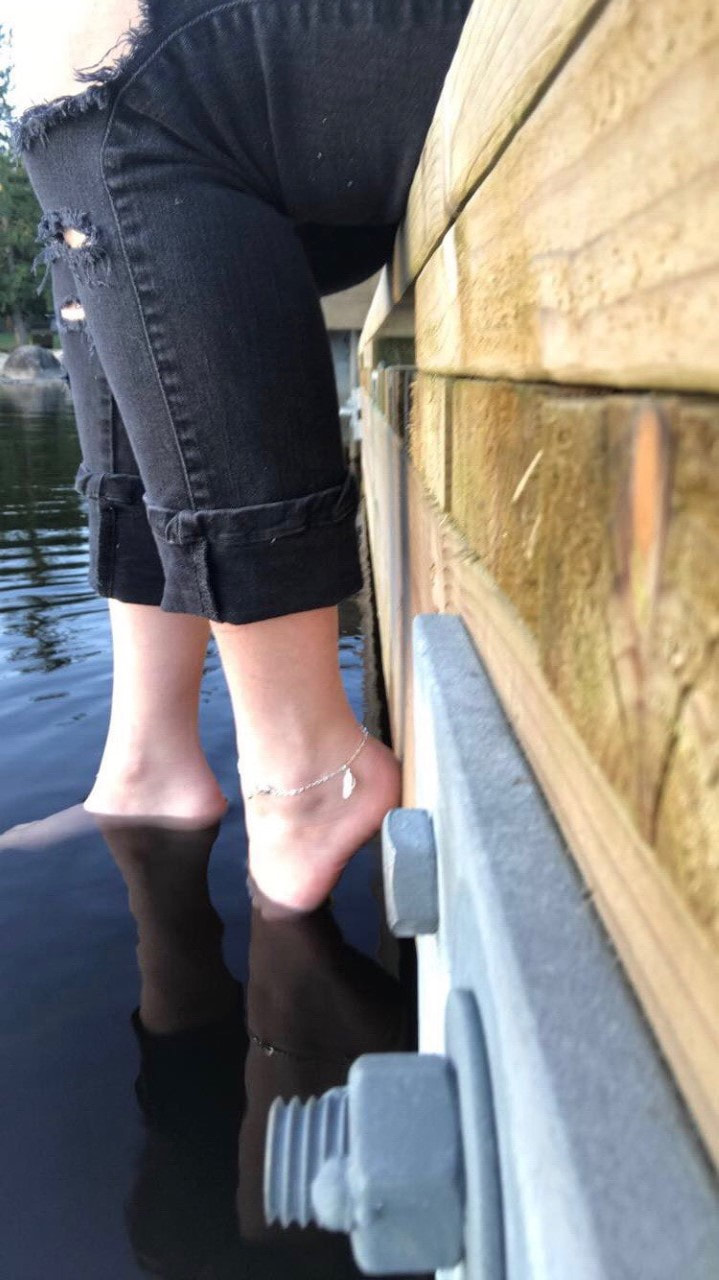
Caitlyn's Leading Lines. Very Creative!
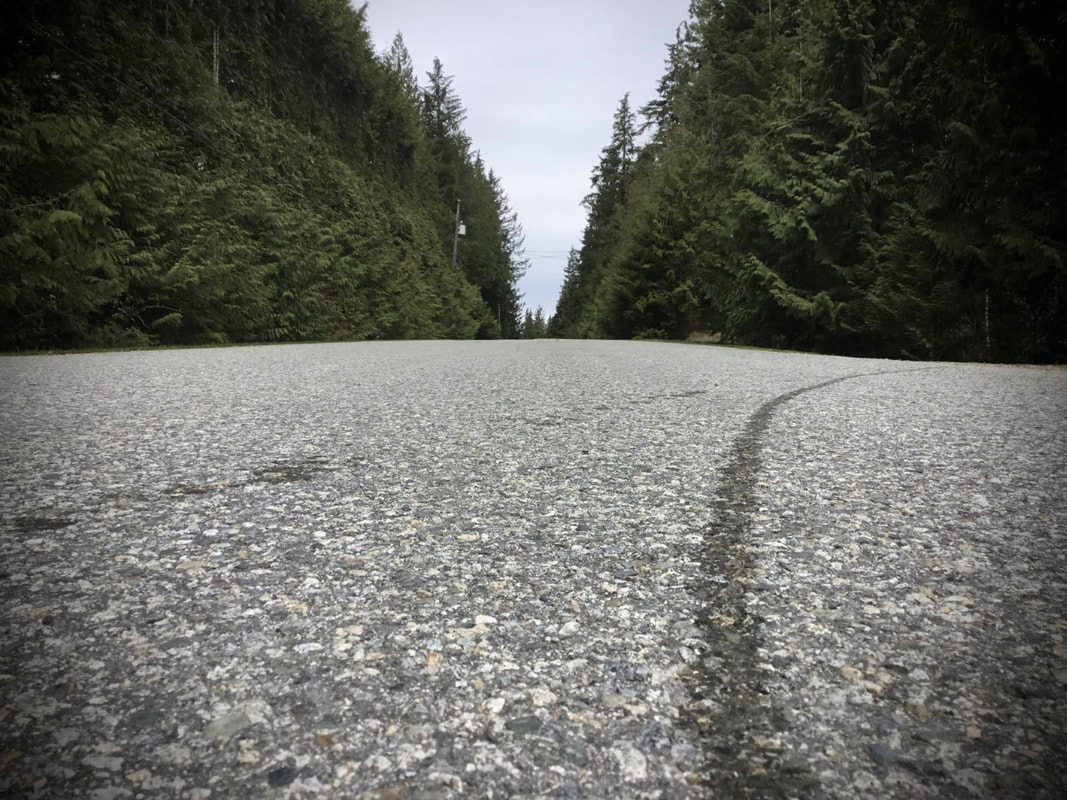
Quinten's Leading Lines. Nice work!
|
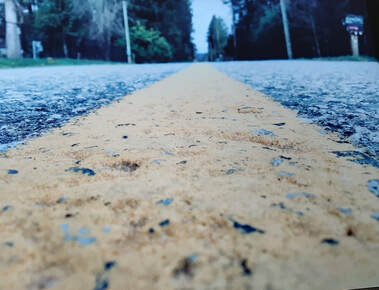
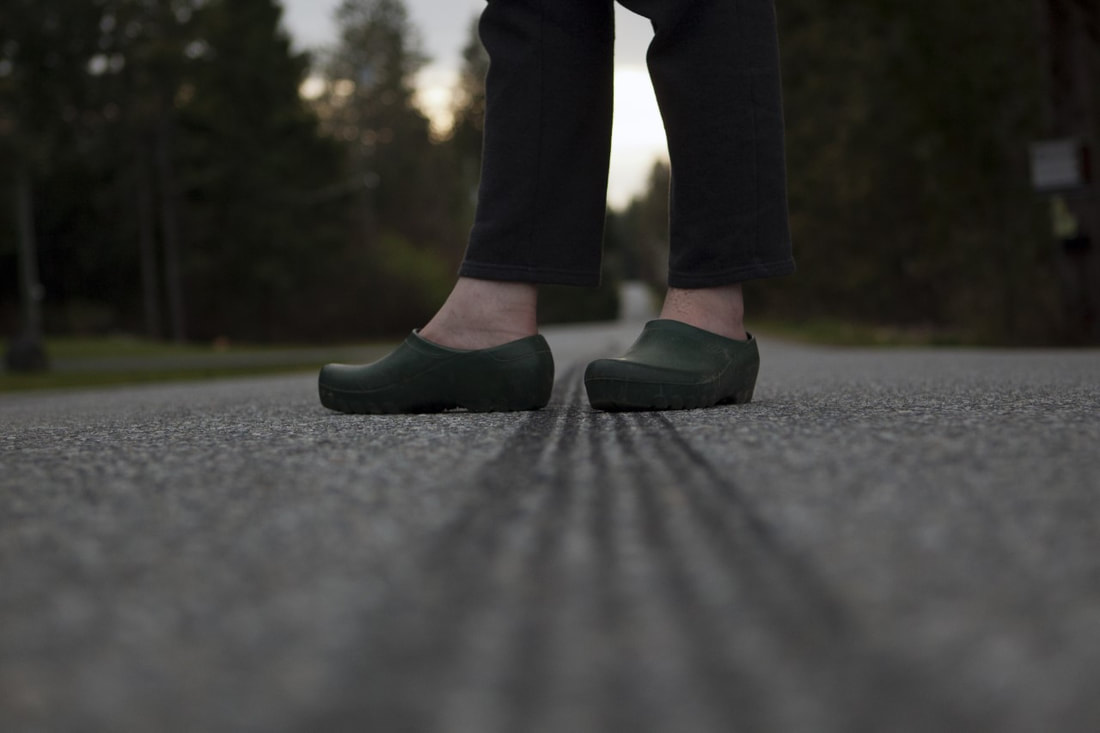
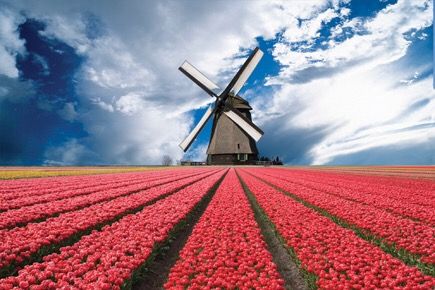
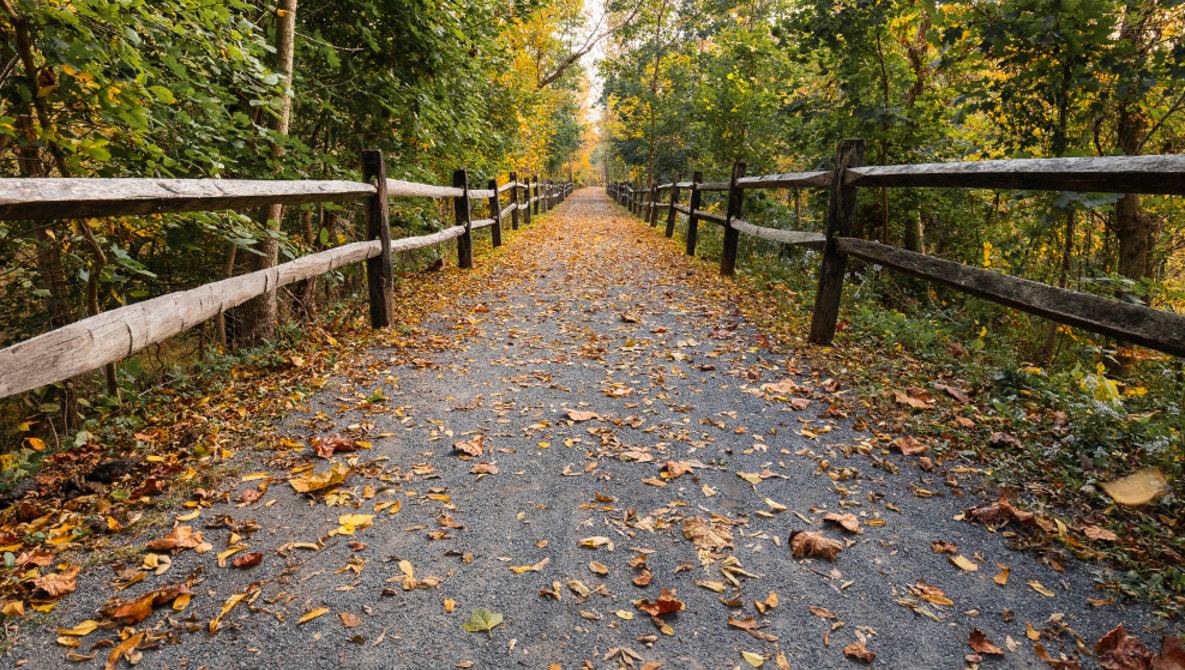
HOME PROJECT 2: LEading Lines
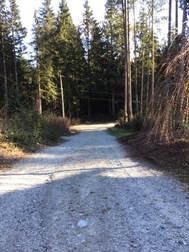
Leading lines are visual elements that work as lines leading your eye towards your subject.
They are used by photographers to direct the viewers attention to the subject of the photograph. See how the lines found in the rows of the flowers lead you eye directly to the windmill?
Leading lines that are used incorrectly can hurt a photograph - leading the viewer's eye away from the subject - not what we want!
See examples below:

1.) Take a photograph of a near-by object with leading lines leading towards it.
2.) Take a photograph of a far away object with leading lines leading towards it.
3.) Take a photography of a person with leading lines leading towards them.
E-mail your favorite photo with leading lines to be featured on the site next week :)
2.) Take a photograph of a far away object with leading lines leading towards it.
3.) Take a photography of a person with leading lines leading towards them.
E-mail your favorite photo with leading lines to be featured on the site next week :)
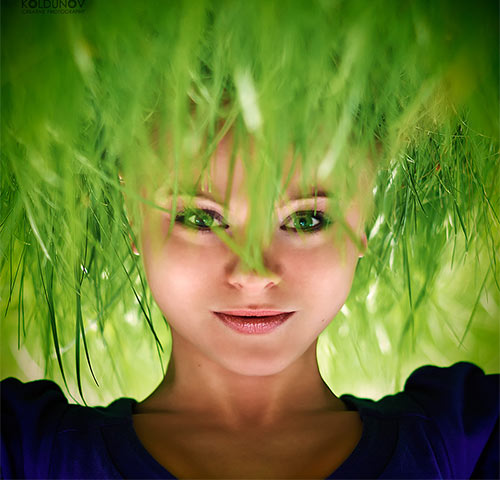
Point of View Featured Photographers
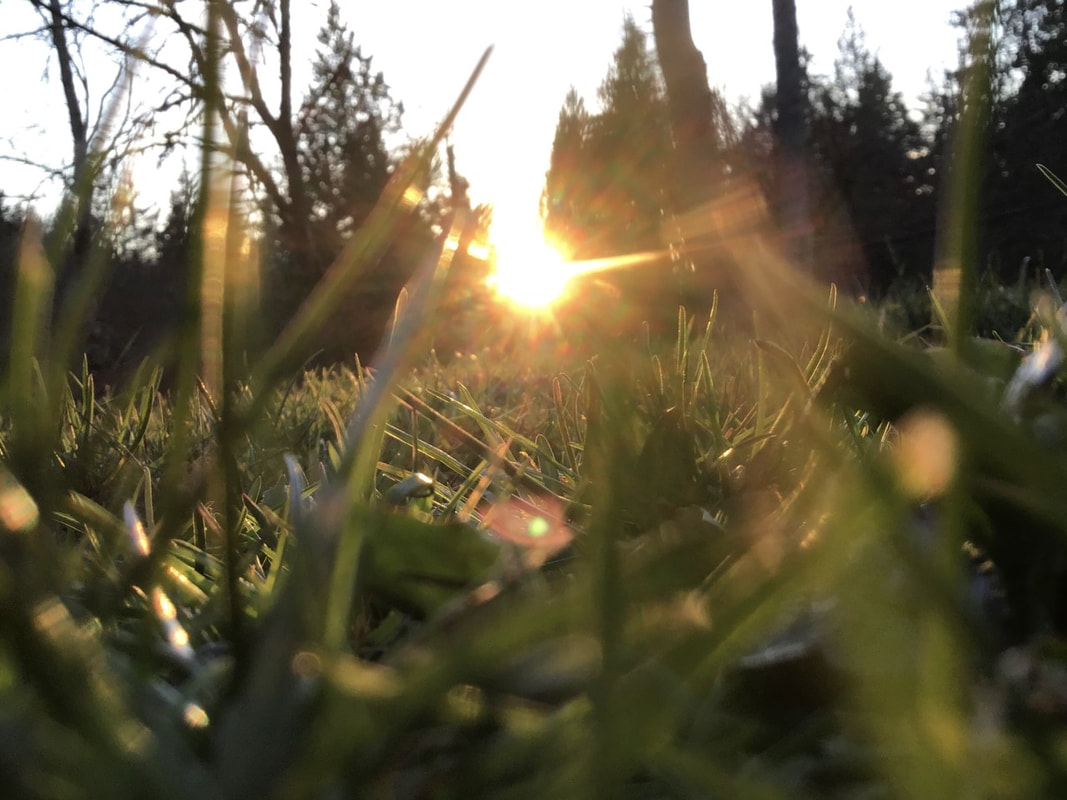
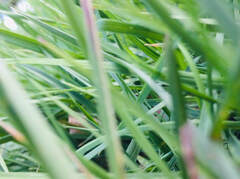
Luis's 'Point of View' through the grass. Beautiful!
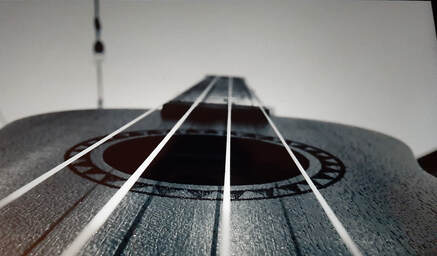
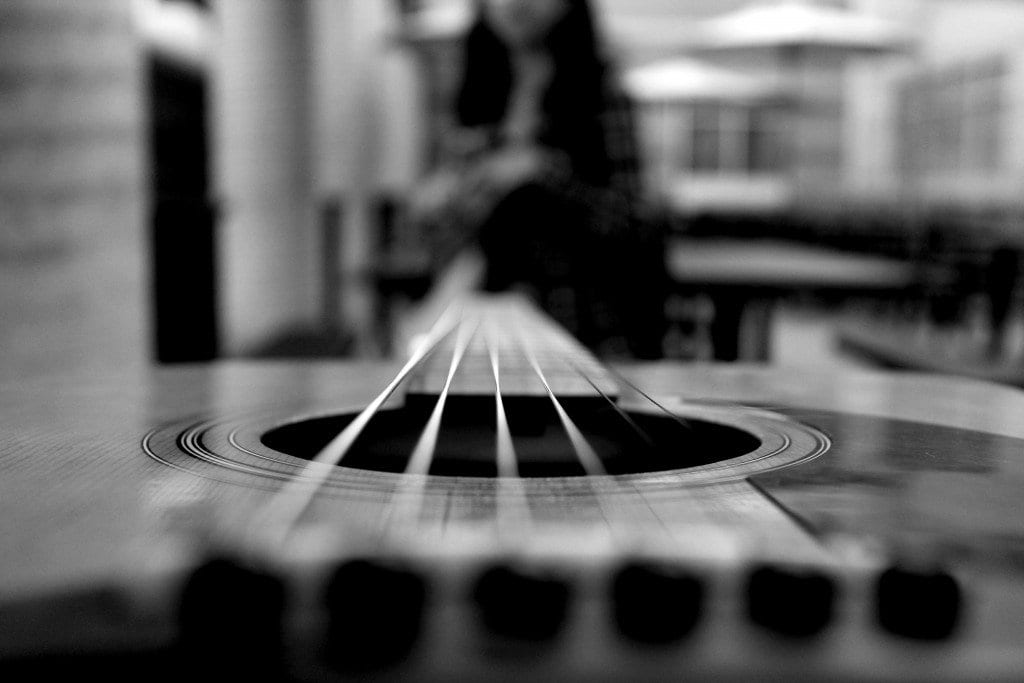
Aidyn Young beautiful example of 'Point of View' Photography using a guitar. Well done!
|
Caitlyn's 'Point of View'. Great work!
|
Davis's 'Point of View'. What a great shot!
|
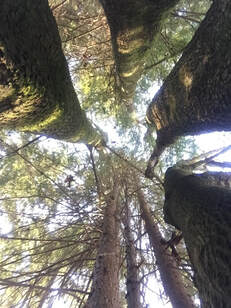
Emily Wades 'Point of View' Below the trees. Nice Work!
|

|
Peter Jenzen's 'Point of View' through the grass. Nice!
|
Jack Jenzens 'Point of View' through the trees. Great job!
Check out these great examples of different 'Point of View' photography by Noah P in Mrs.Kotwal Class!
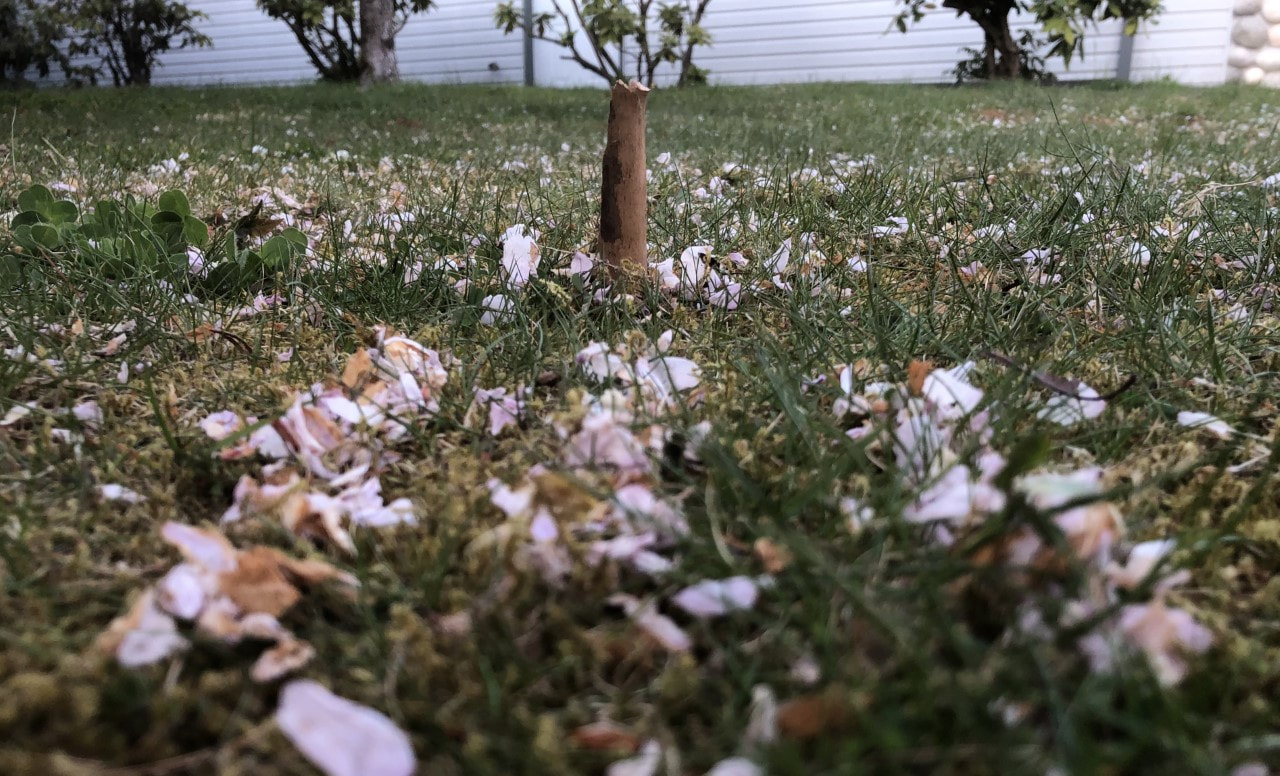
HOME PROJECT 1- POINT OF VIEW
"Point of View" refers to the position from which the camera (or ipad, or phone camera) sees the scene. This is important to consider since this directly changes the position from which the viewers sees the scene as well.
Changing the point of view can drastically change the look of a photograph. It can add drama and interest to an otherwise ordinary scene, or can convey deeper meaning to your images.
This week, I would like to to experiment with different points of view and e-mail me your (1) favorite photo.
Changing the point of view can drastically change the look of a photograph. It can add drama and interest to an otherwise ordinary scene, or can convey deeper meaning to your images.
This week, I would like to to experiment with different points of view and e-mail me your (1) favorite photo.
How Point of view impacts your image:
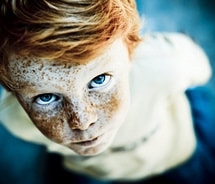
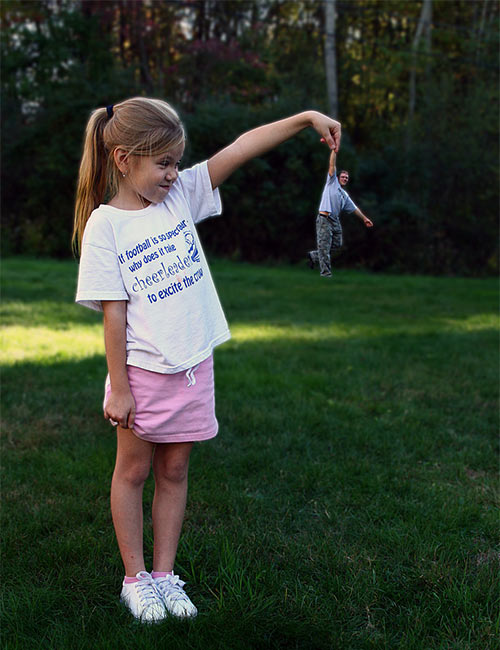
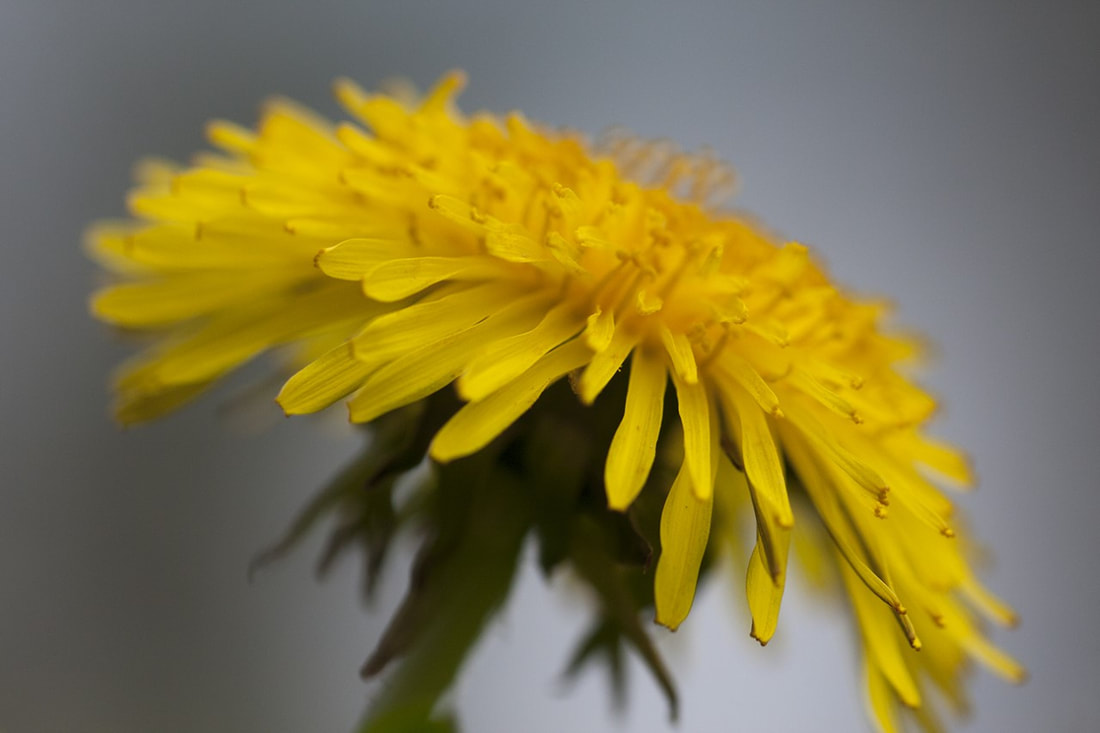
Taking a photograph from above, looking down (bird's eye view) can often make your subject seem smaller, less significant or even vulnerable.
|
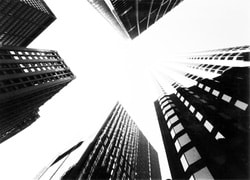
Taking a photograph from below, looking up (worm's eye view) can make your subject seem larger, taller, more significant or powerful.
|

|
|
|
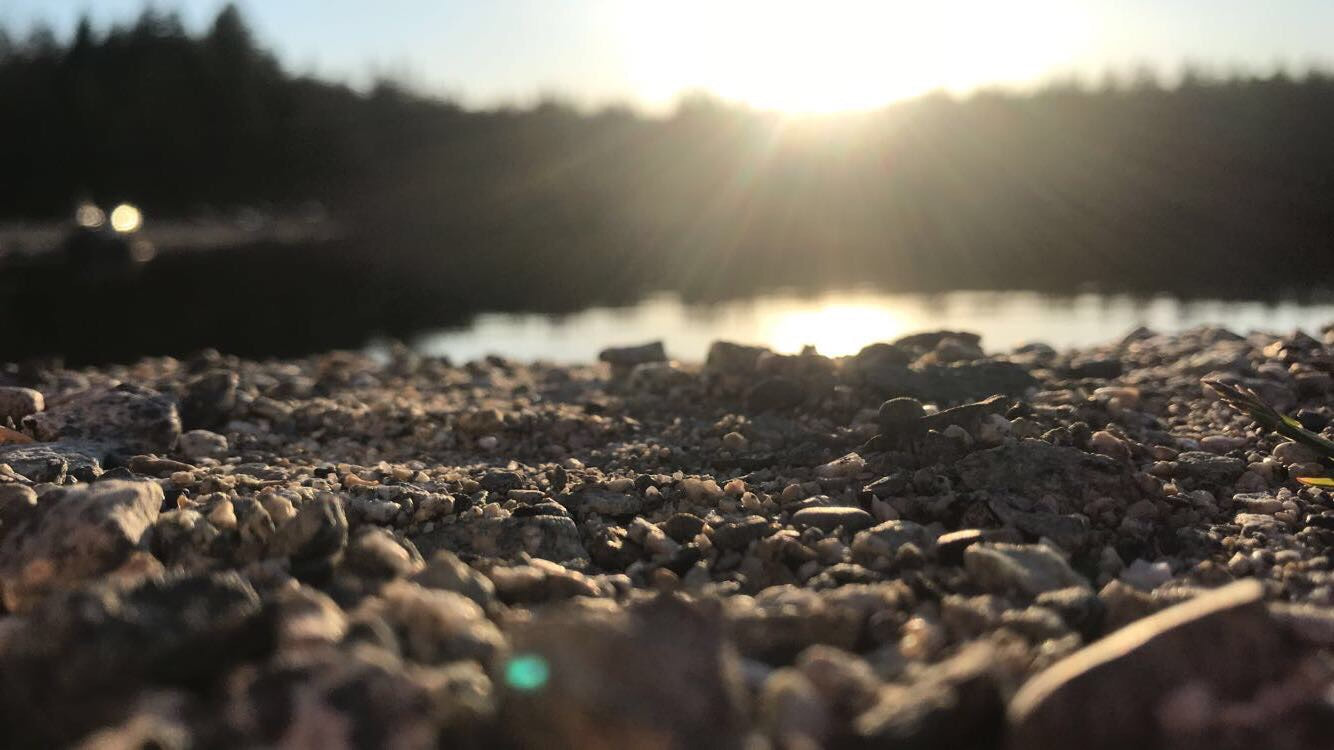
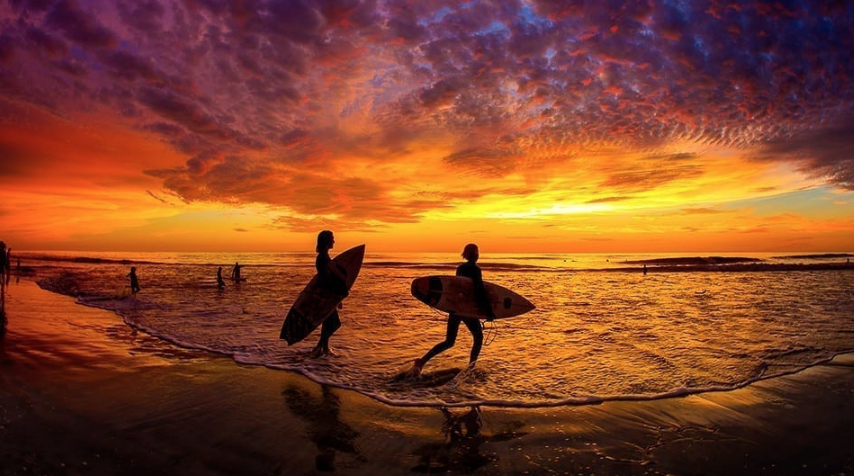
Taking a photograph of an otherwise ordinary scene, but from an ordinary point of view adds interest to a photograph.
|
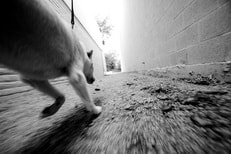
Getting down on your subjects level add's interest to your photo and lets your photograph tell a story from your subjects point of view- a point of view that perhaps we don't see often.
|
WELCOME TO PHOTOGRAPHY!
We have some students who are starting off their photography for the first time & have some students who are continuing on for a second term.
How will this work?
For the first month, we will be working in two groups. "Newbies" are the students who are starting photography for the first time. "Second-Years" will be continuing their second term - with the expectation that you can lend a helping hand the Newbies if they need it. Use your expertise, and get some new ideas from some new brains!
During Photography, we will learn about what makes a great photograph. Each week we will learn about photography, then practice our skills with our cameras. You will select photographs that show what you have learned, and hand those pictures in for your assignments. We will learn to use Light-room and Photoshop to edit our photos.
We will use our class time to practice our photography skills, but remember you can use your own time and equipment as well.
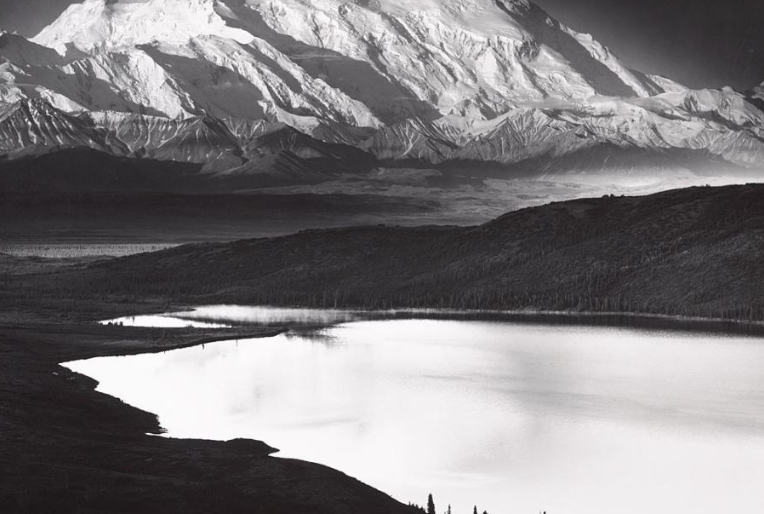
Welcome to Project 1: Learn from the Best
This week you will be learning about famous photographers: their lives, styles, and influences. Browse through the photographers offered - select one that you feel a connection with their photographs.
After you have researched a chosen photographer, you will write a biography and choose 5 photographs that show your photographer's distinct style.
Later, you will be taking photographs that emulate the style of your photographer. After that, you will be putting all of your information together into a powerpoint to share what you have learned.
YOUR ASSIGNMENT:
Research a famous photographer's life and style. Write a brief biography to help us know a little about:
- their life
- why they became a photographer
- what their specialty is
- what made them famous
- what makes their photographs special and what elements of design they use
Once you have researched the 5 points above, you will choose 5 photographs that show off your photographer's style.
Please remember that the biography MUST BE WRITTEN IN YOUR OWN WORDS. Use the websites to find information, and then summarize that information in your biography. The best way to make sure you don't plagiarize is to close the site, and then use your brain to write the information.


If you complete early: BONUS ASSIGNMENT
Google is a great place to start to find photography inspiration! Use the search bar and type in different things such as:
Google is a great place to start to find photography inspiration! Use the search bar and type in different things such as:
- Journalism photography
- Photography Inspiration
- Creative photography
- Conceptual photography
- Architectural photography
- Sports photography
- Landscape photography
- Fashion photography
- Emotional photography
- Travel photography
PROJECT 2: EDITING A PHOTOGRAPH
Today we are going to look into the wide wide world of photograph editing.
Your job: With a partner take your top 3-5 photos. You can also do this individually if you choose.
After taking your photos you will learn how to upload those photos on to the computer and input them into Photoshop. Once your photos are on Photoshop I want you to PLAY. Test and teach yourself the different tools. We will go into more details in the future lessons but for now I want you to experiment.
Use the internet of technology to google Photoshop tutorials.
Hand in your best edited photograph to Mrs. Long
PROJECT 3: Taking a good Photo
WHAT IS COMPOSITION?
Composition is the way you arrange the subject matter in you photograph. It needs to look pleasing and communicate a message you are trying to get across.
ASK YOURSELF:
What do I want to say here?
What is my main subject?
Where is the center of interest?
Do I want vertical or horizontal composition?
Do I want Black and White?
Where should I stand?
Whats in the background?
What is my angle?
YOUR ASSIGNMENT: Now that you know the basics, experiment with each of these! Take your top photos and edit. Hand in your top photo of each of these 6 in a PowerPoint presentation.
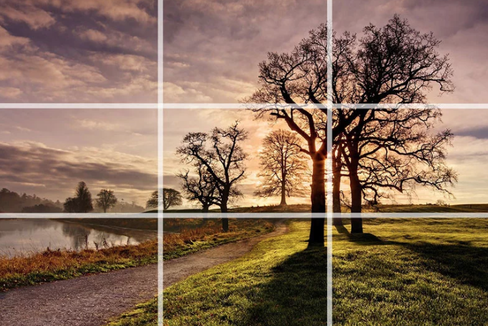
1.) Rule of Thirds
2.) Leading Lines
3.) Symmetry and Patterns
4.) Depth of Field
5.) Framing
6.) View - point
1.) Rule of Thirds
2.) Leading Lines
3.) Symmetry and Patterns
4.) Depth of Field
5.) Framing
6.) View - point
| photography_composition.pptx |
PROJECT 4: STILL LIFE CHALLENGE
Lighting is a very important part of photography. We often use natural light to make sure we can see our subject.
Check out these links to get a deep understanding of lighting and still life photography. Don't worry, I don't expect you to take notes...just pay attention.
Check out these links to get a deep understanding of lighting and still life photography. Don't worry, I don't expect you to take notes...just pay attention.
We will be officially shooting STILL LIFE this week. This means taking a picture of an object that isn't moving.
Select the subject(s) of your still life from the magical box of fun stuff Mrs. Long brought into the classroom or have your personal item ready to shoot. Select a shelf area near the window for natural light, and set up your shot. Take at least 10 shots to make sure you have something good.
Now, set up a shot in a darker area of the classroom. Set up your background, and set up your reflectors and lighting. Take at least 10 shots to make sure you have something good.
Remember to change up your subjects, your lighting, your angles. Take a few more shots. Now, download your photos to the computer and select 1-3 finalists to edit on Photoshop.
Hand in your 1-3 best still life photos to Mrs. Long
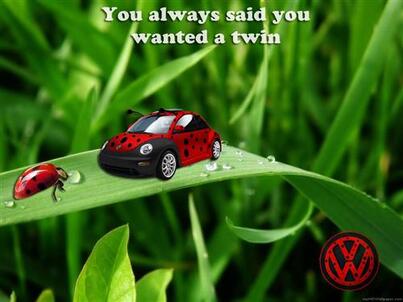
ProJect 5: Graphic Design Beetle Ad
You have been hired as a graphic designer by a car company of your choice. They want to see what other colors they should offer and see an example of how to advertise their product.
Your final product must be a well-developed, attractive advertisement complete with the car's manufacturer logo and unique catchy slogan.
Find pictures of the car you want to make your advertisement for and save them to your Desktop. Paint them with any color and design your mind creates, and add logos to the car and/or background to incorporate your personalized style. BE CREATIVE! Take out the white background and place them in a setting of your choosing. Finally, add some text that conveys your unique slogan to finish off your advertisement.
|

|
How to remove a background using lasso and selection tools -
Below is a Video that will also show you how to use the selection tool in a different way and how to change the background.
Project 6: take a vacation
Place yourself in your dream vacation spot!
Begin by first doing an internet search on places or landmarks that you want to visit. Have a peer take a photo of you a position that will suit the vacation backdrop you are using. Use your knowledge of layers, selection and background eraser to create this project. Must also add at least a couple props into your image.
Begin by first doing an internet search on places or landmarks that you want to visit. Have a peer take a photo of you a position that will suit the vacation backdrop you are using. Use your knowledge of layers, selection and background eraser to create this project. Must also add at least a couple props into your image.
